Change the Homepage Banner
You can easily change the full bleed banner images that slide through on the homepage as well as the text and buttons overlaid on each of them.
Step 1 - Accessing the Homepage
Access the Site Manager and click the Content Manager icon. Then, click Home from your NOT LINKED navigation list to select it for editing.

Step 2 - Edit the Gallery
Double-click the main gallery to add/remove images, and edit their settings.

Step 3 - Add, Remove, Arrange, and Edit Images
Here you can add and remove images, or edit the headline, description, and link for existing images.

Step 4 - Edit the Text Over Images
Regular text displays the script font, bold text displays the larger font, and links will display as a button.

Edit Brand Pages
You can edit brand page banner, descriptions, and customer service rep info. To edit the news and videos that display on the brand pages, see Post News & Video.
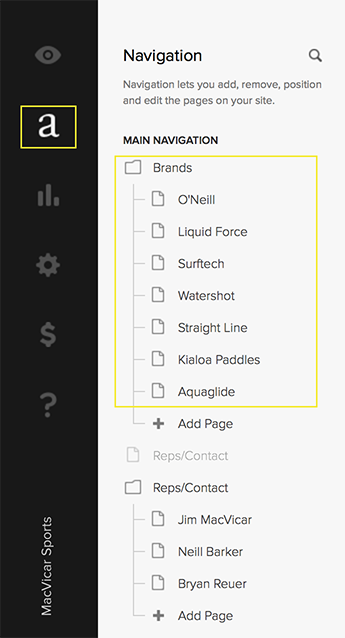
Step 1 - Accessing the Brand Pages
Access the Site Manager and click the Content Manager icon. Then, within the MAIN NAVIGATION, click the brand you'd like to edit from the navigation list.
Step 2 - Edit the Page Content
Once you've selected a brand page, you can edit all of its content directly.

Step 3 - Change the Banner Image
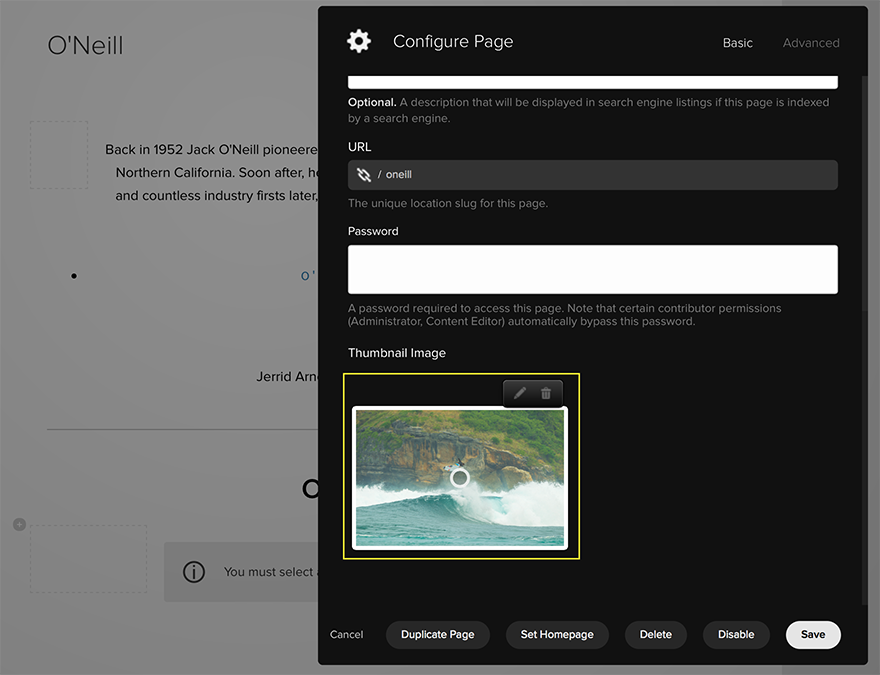
To change the pages banner image, click the Settings button in the upper right corner.

Then scroll down until you see the Thumbnail Image settings. Here you can remove the current image and upload a new one. Make sure that you use high resolution images, at least 1200 pixels wide, here to ensure they are crisp and clear when displayed on the website. If you change the banner image, you will probably also want to also change the banner image on the brand's dealer resources page to match. For instructions on how to do that, see Edit Dealer Resources.
Edit Dealer Resources
Dealer resource pages are hidden from the main navigation and password protected.
Step 1 - Accessing the Dealer Resource Pages
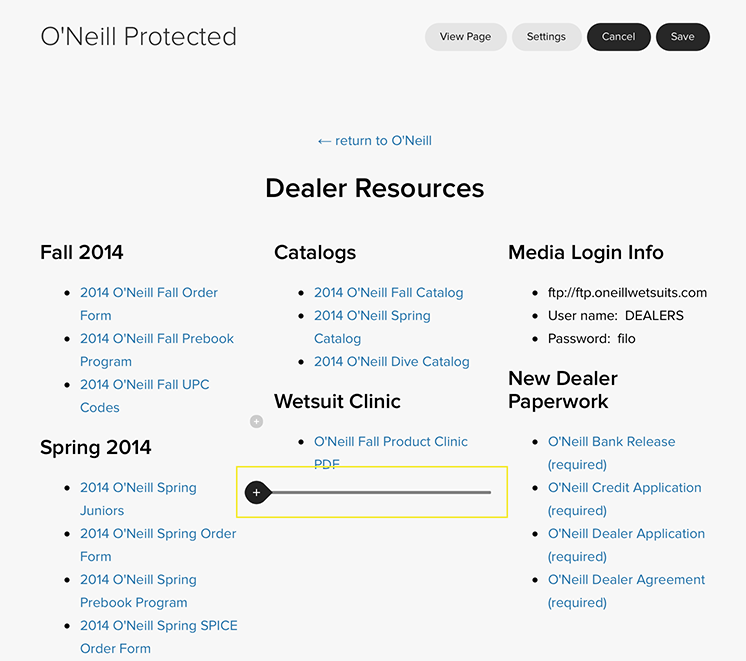
Access the Site Manager and click the Content Manager icon. Then, within the NOT LINKED section of the navigation and click the brand "protected page" you'd like to edit.

Step 2 - Edit and Add Content
Here you can directly edit, remove, and add new content.

Step 3 - Upload a New Document
You can upload and link to a new document. You can simply add a new item to one of the section lists, or create a new section list.
Create a new section list by hovering and clicking on the plus sign where you'd like to insert the list.
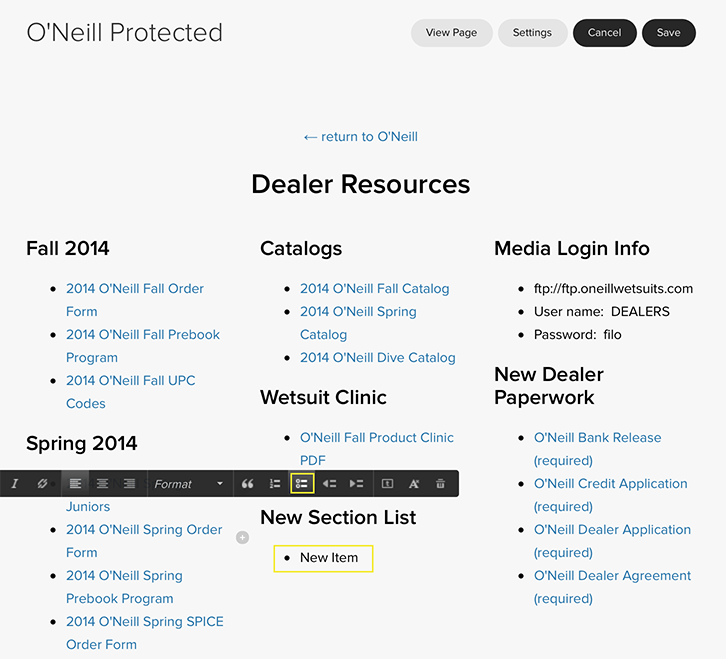
Then click the TEXT button.

Select "Heading 2" from the text format drop-down and type the name of your section title.

Then create a new bullet list and type the name of the item you'd like to add.
Highlight the name of the item you just added, then click the Hyperlink button from the text format menu.

In the Hyperlink box, click Files, then the plus sign to upload a new file. You can also link to existing files you've already uploaded here. Note that file sizes are limited to 20MB. If you need to upload a file larger than that, see Upload Files Larger than 20MB.

Post News & Videos
News articles and videos display in multiple places throughout the website, so it's important to understand how to control where individual posts display. The three places that posts display are the 1) News page, 2) Homepage, and 3) Brand pages.
By default, everything you post will display on the News page and Homepage, but only articles that you tag with a brand name will also display on that brand's Brand page.
For a general guides on how to post an article and add video to an article, see Squarespace's official how-to guides, Adding Content to a Blog Page and Using the Video Block.
In this article, you'll find a few things specific the MacVicar Sports website.
Accessing the News Page
Access the News Page by clicking the Content Manager icon. Then, within the MAIN NAVIGATION section of the navigation, click the News page.

Display a Post on a Brand Page
Once you've added a new post, it will automatically display on the News page and Homepage. But in order to display it on a brand page, you must tag it with that brand's name.
The specific tags are:
- o'neill
- liquidforce
- surftech
- watershot
- straightline
- kialoapaddles
- aquaglide
To add tags when adding or editing a post, click the tag section in the lower left corner, and type the brand you'd like to tag the post with.

Display a Thumbnail Image on the Homepage, News Page, and Brand Pages
You can optionally display a thumbnail image along with the title of the post. This image will also be displayed as a banner image for the post itself, so please use higher resolution images when possible. To add a thumbnail image to a post you are adding or editing, click Options in the upper right corner, then in the Thumbnail section, clicks the plus sign and upload an image.

Enable News Sections
News is displayed on the News page, the Homepage, and each brand page. You can enable each of these independently when you're ready to start displaying news and video content.
Enable the News Page
Access the Site Manager and click the Content Manager icon. Then, within the MAIN NAVIGATION section of the navigation, click News.

Then click the Enable button in the lower right corner, and proceed to enable the news section.

You will now see NEWS displayed in the website's top navigation.
Enable News on the Homepage and Brand Pages
Enabling the news section on the Homepage and Brand pages is just a little tricky and involves removing a little bit of CSS code. If you're not comfortable with this, feel free to call or send an email to me (Micah) when you're ready, and I'll be happy to do this for you.
From the Manage Site section, click the Preview icon.

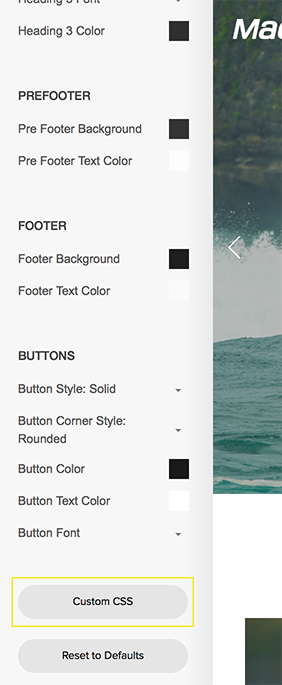
Then, in the bottom right corner, click the Change Style icon.

The style settings will slide in from the left. Scroll all the way to the bottom and click the "Custom CSS" button.
Heed the warning, and click the "Confirm" button.

Custom CSS code will popup in a new window, locate the highlighted code for the Homepage, and remove all of it.

Once you've removed the code, click Save and that's it.
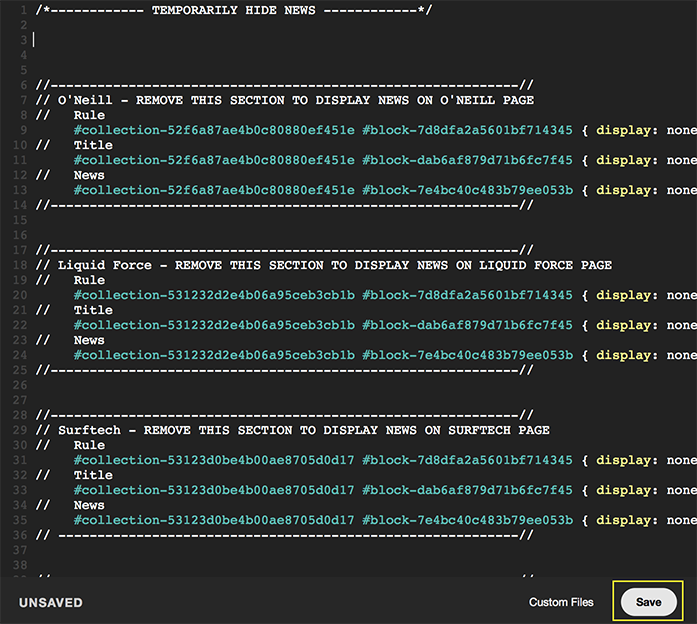
To display news on one of the Brand page, locate the code for the appropriate brand page, and remove it just like you did for the homepage.
Remove Site Wide Password
When you're ready to launch the website, you can remove the site wide password.
Step 1 - Access Website Settings
From the Manage Site section, click the Settings icon, then General from the navigation.

Scroll down the page to the Site-Wide Password section, clear the password field, and click the Save button.

You're website is now viewable to the public.
Upload Files Larger Than 20MB
Squarespace limits file sizes to 20MB. To upload a file to a dealer resource page that is larger than 20MB requires uploading the file to the MacVicar Sports Dropbox account, then linking to that file from within Squarespace.
Step 1 - Sign Into Dropbox
Visit dropbox.com and Sign in with the following credentials (you can change these once you've signed in).
- Username: macvicarsportsgroup@gmail.com
- Password: jmac2014

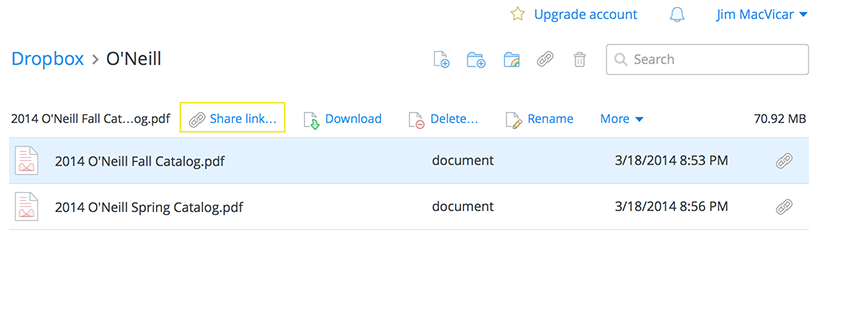
Once you've signed in, upload the file you'd like to link to. After you've uploaded the file, click it, and select "Share Link".
Then click the "Get Link" button.
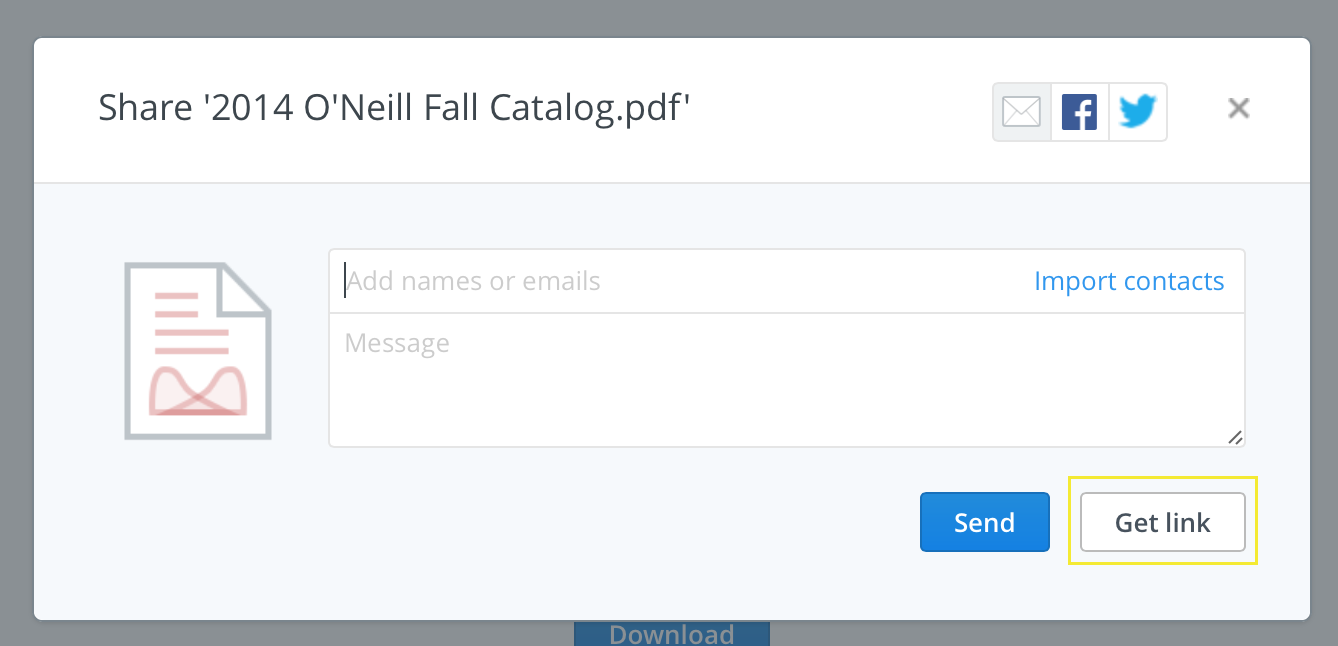
The link will automatically be copied to your clipboard. Now, when adding an item to a dealer resource page, you can choose "External File" and paste the URL from your clipboard.
